How to Annotate on a PDF: Boost Your Study Workflow
How to annotate on a PDF goes beyond underlining or scribbling notes. It's about creating a system that boosts understanding and keeps you engaged with the material. By using smart highlights, clear margin notes, and key idea markers, you can transform any PDF into a tool that actively supports your learning. This guide will show you how to annotate on a PDF efficiently, whether you're studying, working, or capturing thoughts for later use.
What to Prepare for Annotating on a PDF?
Before jumping into how to annotate a PDF document, a little setup preserves clean marks and maintains study flow on a black and white E Ink screen.
1) Pick the session goal
A clear goal prevents over-marking on PDF.
- Study: definitions, claims, examples worth revisiting
- Work: decisions, risks, questions, action items
- Casual reading: surprises, disagreements, standout ideas
2) Use a minimal mark set
Too many marks create noise. Start with a small system.
- Highlight for must return lines
- Box for terms and definitions
- Star for revisit pages
- Question mark for unclear points
3) Use a One-Line Note Format
Short, simple notes on PDFs keep your annotations clear and easy to review. Stick to a one-line format:
- Tag + concise sentence to capture the core idea without cluttering the page.
Common tags:
- Claim: Key points or arguments (e.g., Claim: This theory is flawed because...)
- Why: Reasons behind an idea (e.g., Why: This matters because...)
- Q: Questions for further exploration (e.g., Q: What evidence supports this?)
- Next: Action items or follow-ups (e.g., Next: Research more on topic X)
4) Set one anti-clutter rule
Establish a single constraint to keep annotations on PDF clean and readable while staying focused.
- Limit to three highlights per page maximum. Focus only on key points.
- Use one margin note per page. Keep your thoughts concise, ideally related to the main points.
- Add one takeaway line at the bottom of the page. Serve as a quick summary or action item.
How to Annotate on a PDF File with a Clear, Focused Workflow?
Annotating works when each mark has a specific purpose, so this workflow treats annotating on a PDF as a sequence of small, repeatable decisions that keep the study flow steady and leave notes on the PDF that still make sense a week later.
How to access annotation tools and start marking a PDF?
1. Import the PDF into Viwoods:
-
Via ViTransfer: Open ViTransfer and tap Import. Scan the QR code or visit my.viwoods.com on your computer to upload the PDF directly to your device.
-
Using Cloud Storage: Log into Google Drive, OneDrive, or Dropbox via Viwoods Files APK, select the file, and import it into My Library.
-
Via Email: Send the PDF as an attachment to your Viwoods email (if configured), and import it directly from Viwoods Mail.
-
Using USB or Data Cable: Connect your device to a computer via USB, then transfer the PDF to your tablet's local storage via Viwoods Files APK.
2. Open the PDF in Learning: Once the PDF is imported, go to My Library and tap on the file to open it in Learning.
3. Expand the menu to access tools: Tap the top fifth of the screen to reveal the main menu.
How to make effective marks on text, notes, and visuals?
Highlighting text:
Use the Selection Tool for selectable text. Long-press to select, then tap Highlight to mark key points. Highlights are saved in Reading Notes → Highlight for quick access later.
Writing notes:
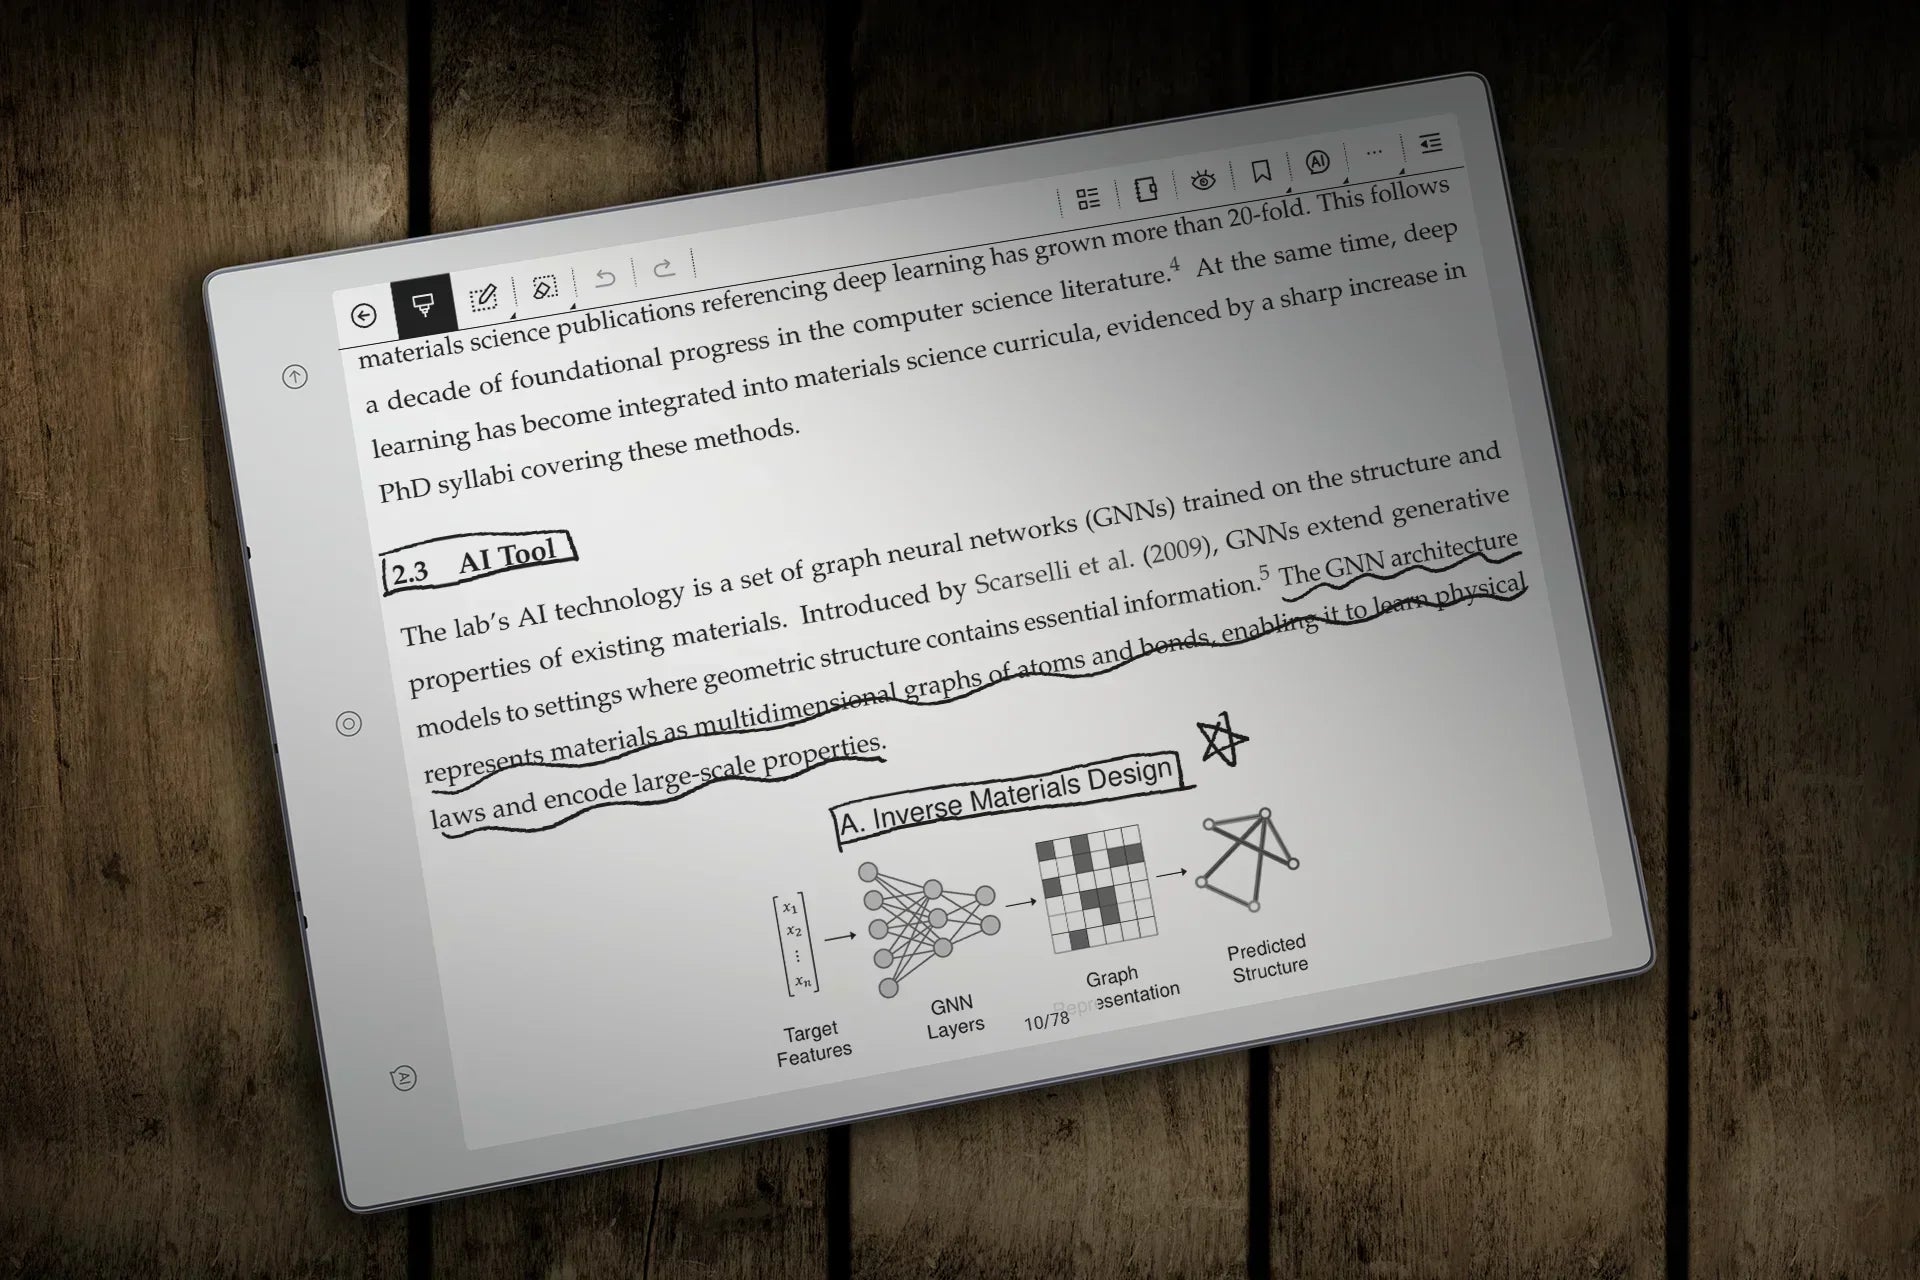
Use Annotations (Pen) to handwrite notes, selecting from a variety of pen types such as fountain pens, art pens, technical pens, or highlighters, each suited for various kinds of annotations. Adjust both pen size and pen pressure sensitivity to control the thickness and precision of your strokes, allowing for finer or thicker lines as needed.
When marking specific content, consider using underlining for key points, circling important terms, and boxing definitions or concepts. This approach keeps your annotations easy to review later.
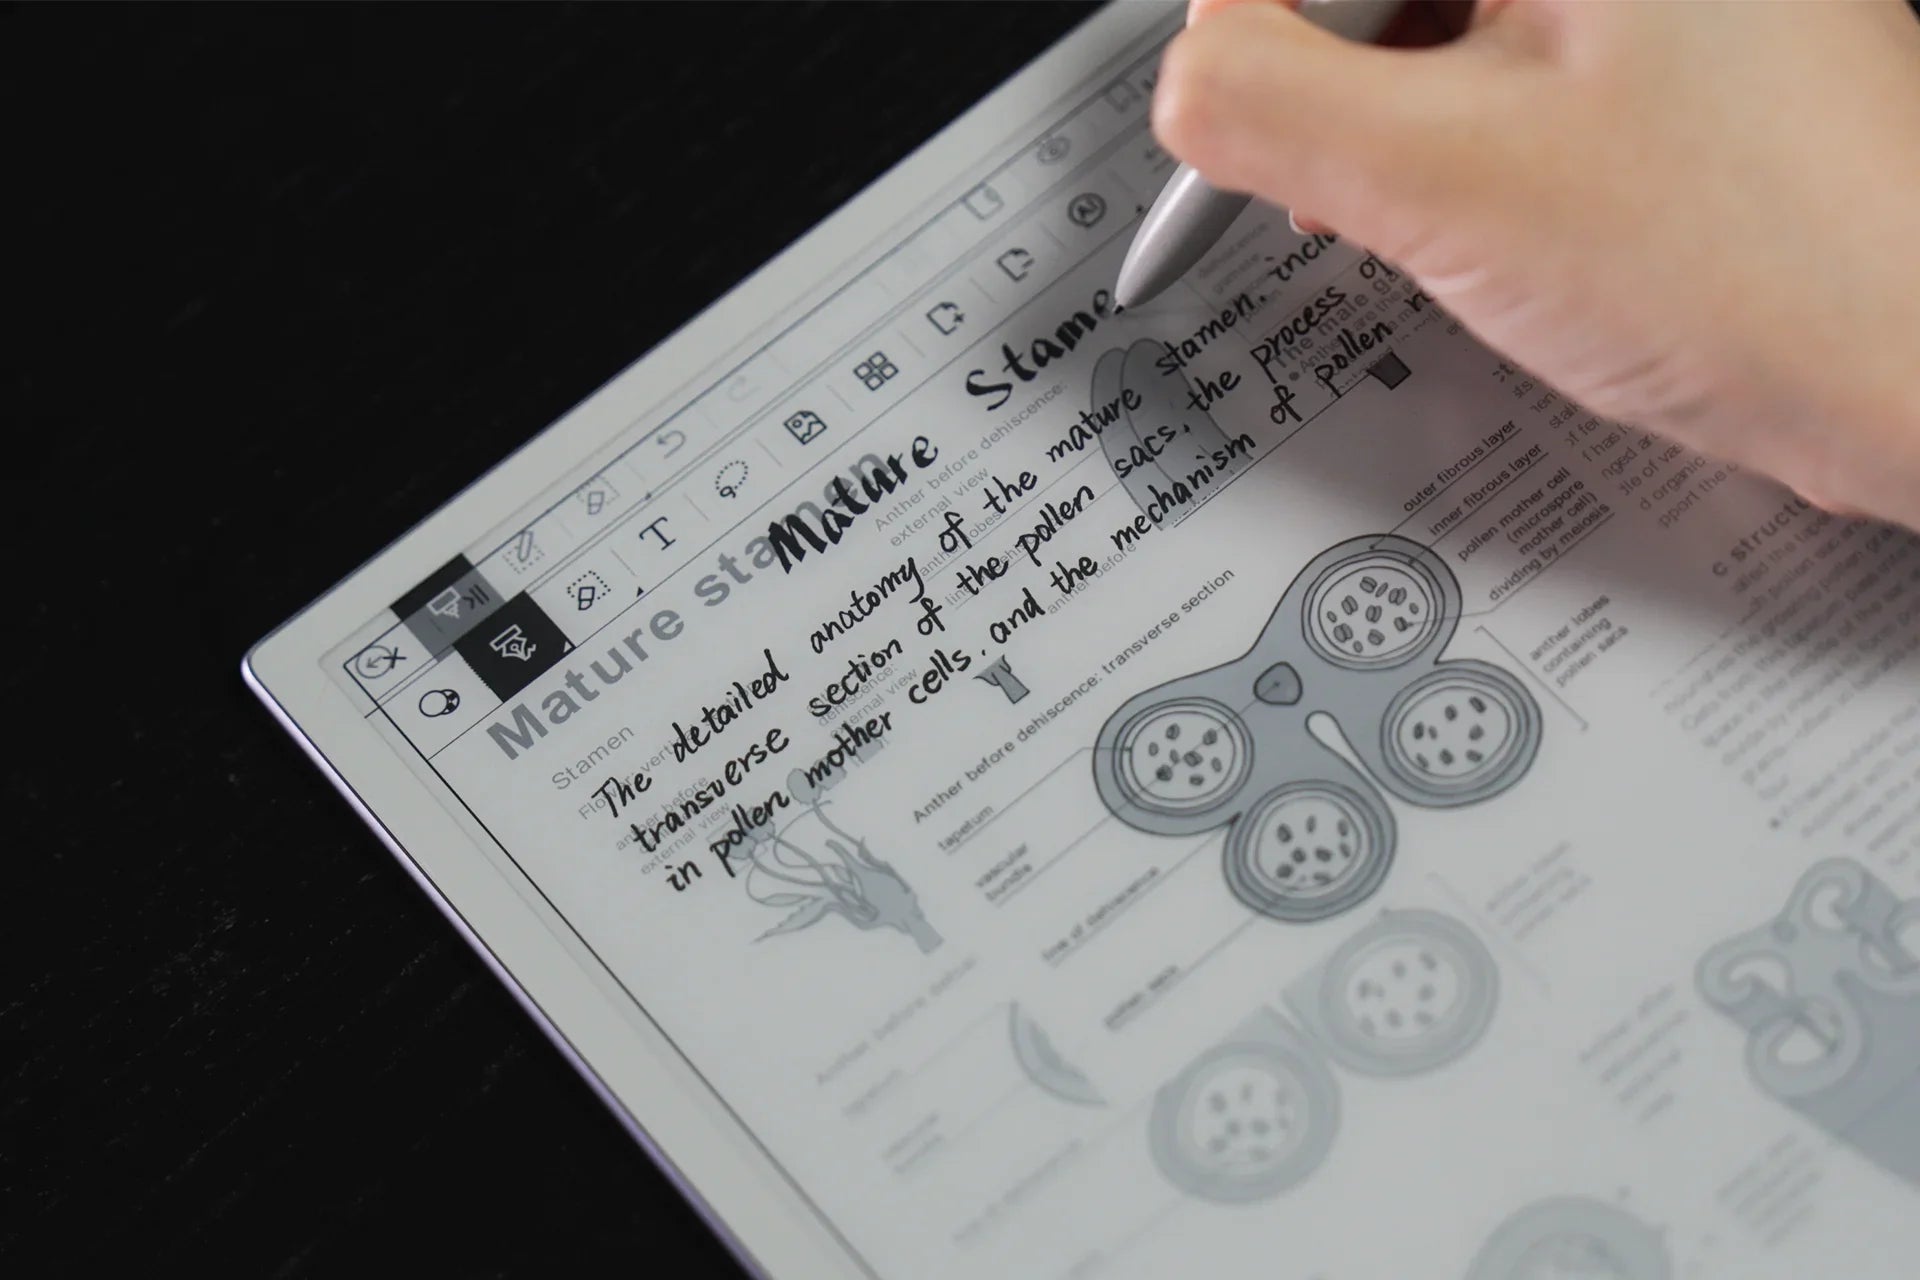
Annotating visuals:
For charts or images, first use Display (PDF) settings like HD Display or Denoise for better clarity, then mark with Annotations (Pen). Use arrows, boxes, or labels to point out important elements or data.
Undoing and correcting marks:
Quickly fix mistakes with Undo by stroke or the Eraser tool (use pixel eraser, lasso eraser, or erase all for broader changes). Additionally, the Eraser function within the pen tool allows for quick corrections, making the process smooth and efficient.
How to enhance visibility with Zoom and Landscape mode?
Use pinch gestures to zoom in on small text or details, then swipe with two fingers to navigate the page. For wider views, especially with two-column layouts or tables, switch to landscape mode. In landscape, handwriting is supported only within the dashed line area, so ensure your notes stay within that region for clarity.
How to Use AI While Annotating Without Distraction?
AI can enhance your annotations, but using it with focus and purpose is key. Here’s how to integrate AI seamlessly into your workflow:
1. Clarify complex ideas with AI
When you encounter something unclear, highlight it and ask AI for clarification.
Example prompt: "Explain this claim in simpler terms."
2. Summarize key points with AI
After highlighting, use AI to generate concise summaries to save time.
Example prompt: "Summarize the key idea of this paragraph."
3. Generate questions for deeper understanding
Ask AI to create study questions or next steps based on the highlighted text.
Example prompt: "What questions should I ask about this section?"
4. Use short, focused prompts
Keep AI use brief to avoid distractions. Only ask for specific insights or definitions.
Example prompt: "What does 'X' mean in this context?"
When text is highlighted, a tool panel offers instant access to AI-assisted translation, definitions, and additional insights, all integrated within your reading session, helping you get immediate context or understanding without leaving the page.
The physical AI button, located at the bottom right of your Viwoods paper tablet, provides two ways to interact with AI: tap it to receive instant insights, such as explanations or contextual information, in a floating dialog, or press and hold to use voice-based AI, where you speak your query and get a response without interrupting your reading.
How to Export or Share Annotated PDF Files?
Method 1: Share via the Three-Dot Menu
1. Open the annotated PDF in the Learning.
2. Tap the three-dot menu in the top-right corner.
3. Select Share to share the PNG file via ViTransfer, QR code, email, Bluetooth, Cloud Drive, or third-party apps.
Method 2: Share via Reading Notes
1. Access Reading Notes in the Learning, where all annotated pages within the PDF can be collectively viewed.
2. Select one, multiple, or all annotated pages to compile into a single PDF file.
3. Tap Share to send the compiled file via ViTransfer, QR code, email, Bluetooth, Cloud Drive, or third-party apps.
Method 3: Export via Viwoods Files APK
1. Open Viwoods Files APK.
2. Navigate to My Files and locate the annotated PDF in the Reading Notes file.
3. Export the file as a PDF to third-party cloud drives or save it to Internal Storage for easy access when connecting to a computer.
Conclusion
Learning how to annotate on a PDF allows you to capture key insights, organize your thoughts, and enhance your understanding of the material. By using tools like highlights, margin notes, and AI features, you can make your annotations purposeful and easy to review. With options to share, export, and sync your annotated PDFs, your notes stay organized and accessible across devices.

Leave a comment
This site is protected by hCaptcha and the hCaptcha Privacy Policy and Terms of Service apply.